目录
[〇、运行环境:CentOS 7.6]
[一、安装Docker]
[二、Docker安装Gitlab]
[1、查找GitLab镜像]
[2、拉取GitLab社区版镜像]
[3、运行GitLab社区版容器]
[4、登录GitLab]
〇、运行环境:CentOS 7.6
为了使以后的维护更方便,在备份和迁移Git时,不需要重新搭建环境,使用Docker来构建Git服务,将Git下的数据挂在
Docker的宿主机,日后只需要要拷贝Docker镜像和挂在的数据即可。建议服务器的配置为:最低2核4G内存; 最优4核8G以上。
一、安装Docker
Docker安装可以参照runoob教程(http://www.runoob.com/docker/centos-docker-install.html),这里不再详述。
注意:鉴于国内网络问题,后续拉取 Docker 镜像十分缓慢,我们可以需要配置加速器来解决。配置完成需要重启生效。
二、Docker安装Gitlab
官方教程
https://docs.gitlab.com/omnibus/docker/
1、查找GitLab镜像
docker search gitlab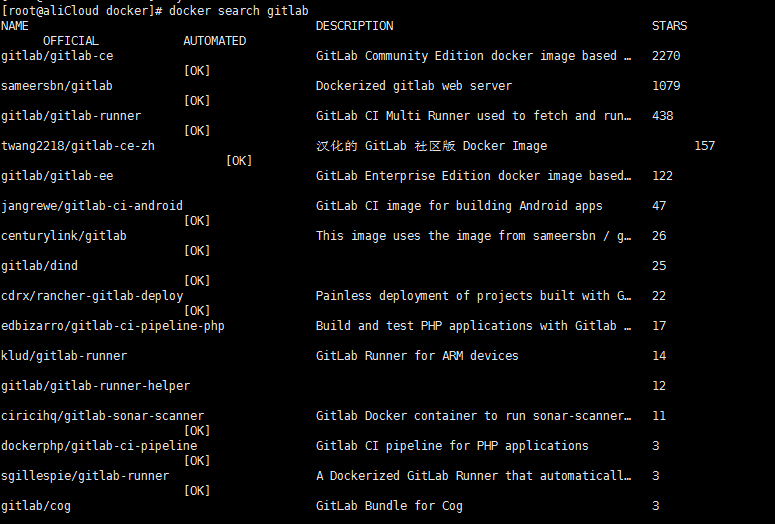
2、拉取GitLab社区版镜像
docker pull gitlab/gitlab-ce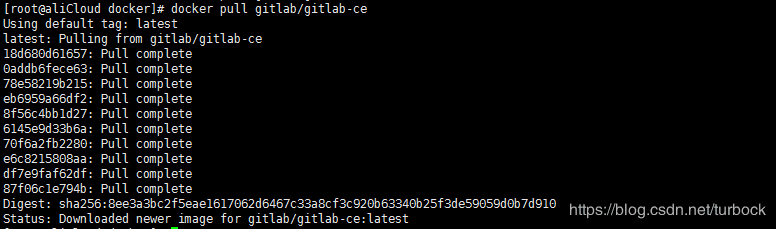
注:CE 即社区免费版, EE 即企业版,需付费使用。
- 源码安装
- 地址参考 https://mirrors.tuna.tsinghua.edu.cn/gitlab-ce/yum/el7/gitlab-ce-10.6.4-ce.0.el7.x86_64.rpm
- 修改gitlab配置文件指定服务器ip和自定义端口:
vi /etc/gitlab/gitlab.rb
external_url 'http://123.123.123.123:4321'
重置并启动GitLab
gitlab-ctl reconfigure    // 需要一点时间
gitlab-ctl restart
源码安装这里不继续介绍
3、运行GitLab社区版容器, 并路径映射
- 创建GitLab目录
mkdir -p /docker/gitlab/config
mkdir -p /docker/gitlab/logs
mkdir -p /docker/gitlab/data- 运行容器
docker run -d -p 2222:22 -p 2280:80 -p 2443:443 --volume /docker/gitlab/config:/etc/gitlab --volume /docker/gitlab/logs:/var/log/gitlab --volume /docker/gitlab/data:/var/opt/gitlab --restart always --name gitlab gitlab/gitlab-ce:latest--detach: 设置容器后台运行
--hostname: 设置容器的 hostname
--publish: 端口转发规则
(
22: SSH访问端口,
80:Http 访问端口,
443:Https 访问端口,
-----------------------------
自定义GitLab端口转发规则
2222:Docker 容器的 SSH 访问端口,
2280:Docker 容器的 Http 访问端口,
2443:Docker 容器的 Https 访问端口,
)
--name:容器名称
--restart always:每次启动容器就重启GitLab
--volume: 共享目录挂载,即 docker 容器内外数据共享
(
/docker/gitlab/data: 应用程序数据,
/docker/gitlab/logs:GitLab 的 log,
/docker/gitlab/config:GitLab 的配置文件)注:
//可参考命令如下:
docker run --detach \
    --hostname 192.168.0.116 --publish 10443:443 --publish 10080:80 --publish 10022:22 \
    --name gitlab \
    --restart always \
    --volume /srv/gitlab/config:/etc/gitlab \
    --volume /srv/gitlab/logs:/var/log/gitlab \
    --volume /srv/gitlab/data:/var/opt/gitlab \
    gitlab/gitlab-ce:latest
//映射的端口号根据情况可自行设定
//安装完后便可访问GitLab:http://192.168.0.116:10080
//--hostname: 设置容器的 hostname ,最好先不要设置,设置报错:Unable to find image '***:latest' locally。
4、登录GitLab
安装完GitLab,访问:http://云服务器IP:2280,开启GitLab配置使用。
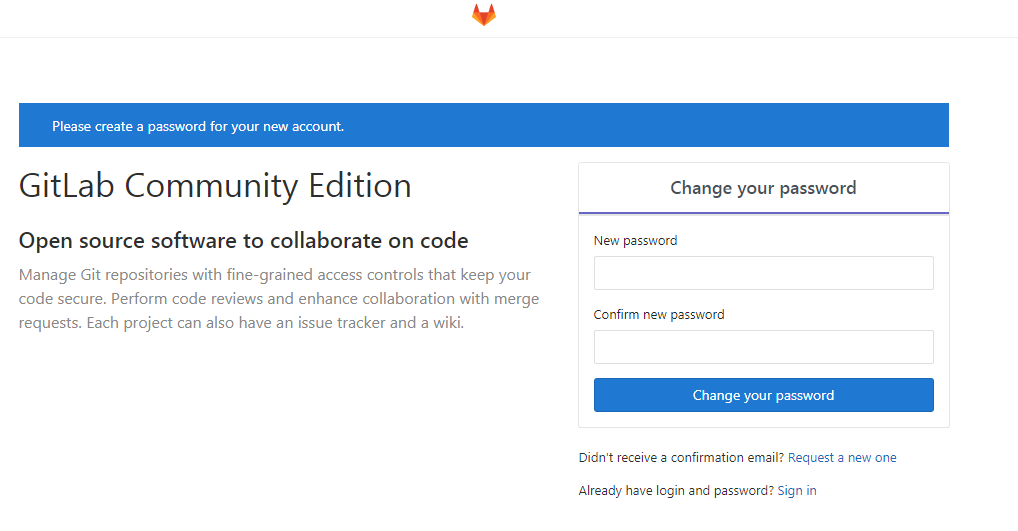
默认的账号是root,添加该管理员密码后就可以登陆GitLab了。